

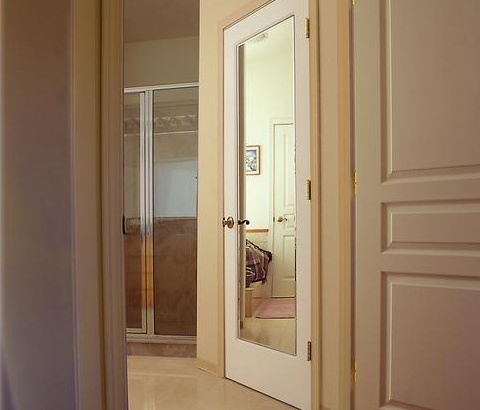
Installing a mirror on a door is a little different than installing a mirror on a wall. But how? If you don’t have the right measurements, mistakes can be costly! It’s not always as simple as drilling a hole and putting in a nail or screw. So let’s explore some tips, advice, and strategies for hanging mirrors.
Table of Contents
Tips For Hang A Mirror On A Door
Buy Right Mirror
You can’t just take a mirror out of the bathroom or dressing room and stick it to the door. You might even think it’s a good idea to raid auctions, locker auctions, or demolition sites to salvage used mirrors. The latter seems particularly lucrative. I mean, they’ve ripped the wall off. So if it wasn’t smashed during the destruction process, you might be able to get it for free.
But the door mirrors have specific settings and functions. They are deliberately designed to be light in order to avoid adding extra mass or stress to the door. Because they are made of lighter materials, they are usually less expensive than regular mirrors. You can get one for less than $10, so get the right version.
Type of Inspection Door
There are many different kinds. Glass doors (commonly known as French doors or French windows), solid wood doors, hollow doors, MDF doors, metal doors, and even plastic doors. The grade of the door will affect your installation options. For example, you cannot twist or hammer glass doors. Even metal doors, if not drilled, can be impervious to water.
For hollow doors, the fasteners need to be placed on a thicker, more solid part of the surface. Think of it as locating studs in your drywall…though a stud finder probably won’t help with hollow doors. Door mirrors are ideal for hollow doors because you don’t have to drive any nails or screws into the door. You can use nails to attach the frame.
Use the Specified Door Mirror Hanger
They look a bit like wreath stands with a U-shaped tip. But unlike wreath hooks that curl on the sides, mirror hooks have a flat tip and a hooked tip. The hooks are usually at right angles to help them be flush with the door. That’s the key, pun intended. If the mirror hanger is too thick or too bent, it may block the gap above the door, preventing the door from closing.
You can buy these mirror stands for a few dollars each. Depending on the quality of the mirrors, you may need two or three. Place the hook behind the mirror and confirm its position with a marker. Use thumbtacks to poke small holes in the frame, then use suitable nails or screws through the holes. Now you can open the door and hang the mirror.
Use Plastic Clips
Mirror clips are similar to cable clips. But the mirror clips are not small nails in a u-shaped plastic box, but screws in a plastic block. The block allows the clip to support the weight of the mirror, but it still has to be a lightweight mirror. Check with the hardware store staff how many ounces or pounds each clip will hold. You need at least six.
Place the two clips under the mirror, making sure they are on the thicker part of the door. Otherwise, the screw will penetrate to the other side. Twist them halfway, put the mirror on top, and screw all the way in. The glass will be flush with the clip and door. Repeat the process, placing two clips on the side of the mirror and two more on the top.
Use Tape
No matter how strong the tape is, it cannot support the mirror alone. Hmm… duct tape might, but you’ll need a lot, and overdoing it can be ugly. Instead, use tape to reinforce other fastening tools, such as nails and screws. Based on the recommendations we’ve discussed so far, you can apply tape to the back of the mirror before securing the nails, hooks or screws.
Double-sided tape works best, but if you don’t have double-sided tape, you can roll one side into a loop. You can also use the sticky side of bumper stickers or car stickers. Roll the sticky side into a ring so that the printed part is on the inside. Gently press the mirror against the door to ensure the adhesive locks. This reduces dust gaps and air pockets between the mirrors and doors.
Slide On The Rope
Many hanging mirrors are lighter in weight. Manufacturers, glass cutters and framers know that lower-quality glass is safer to hang and therefore lighter than a mirror mounted directly on the wall. Also, these types of mirrors usually have D-rings on both sides. These rings make it easier to install the mirror, so they may have yarn loops between the rings for instant installation.
If the string is pre-strung, thread it through one or two, or even three mirror hooks. This is different from the hook type mentioned in tip 3. A wreath hook might work better because it has a hook on both sides, one to hang on a door and another to hang a mirror. If your mirror doesn’t have a string, you can thread a piece of yarn or draw thread through the D-ring and use that instead.
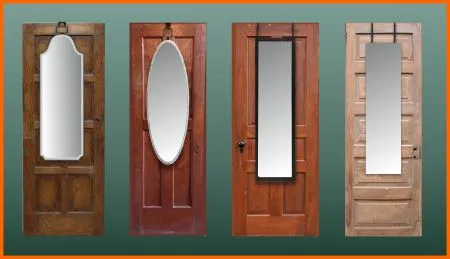
Buy Pre-prepared Mirrors
You can avoid all the drama by having a hanging mirror ready. Hooks are already attached to the doors of these mirrors. So all you have to do is take it home and slide it down the open door. Choose a hook or bracket that matches your door trim. A glass door might need something subtle, since the door is thinner, so the hook width is narrower.
For wooden or metal doors, you can choose wider hooks or a finish that matches or provides a stylish contrast to the mirror and door. You can even choose a mirror with a delicate or fancy decorative finish. This particular model has LED bulbs, batteries with timer, D-rings, hangers above the doors and a gold-plated frame. The timer can be set to 2h.
Get Some Fritted Glass
In many third-world countries (and even the more remote parts of the US), gadgets like screw clamps and garland hooks are hard to find. But you can almost always find the reflective glass. Also, if you buy the mirror directly from the glass manufacturer, you may get a wholesale price, which is much cheaper. However, these types of images do not necessarily have frames.
If the glass is not framed, ask your glass supplier to drill holes in the glass for you. They have professional tools that can pierce mirrors accurately, and neatly, and most importantly, won’t shatter or break the glass. Take some specified glass screws from the hardware, they usually have round decorative rivets. Securely attach the mirror rivets to the door.
Use a Center Screw
Even if the door is hollow, it is easy to drill screws into the top surface of the door. Keep the door open and use a well-made ladder to safely access the top of the door. Use a screw gun to place screws or nails in the top middle section of the door. Depending on the weight of the mirror, multiple screws may be required. You may end up needing an entire row.
Don’t screw them all the way in – you need a little wiggle room. Using sturdy yarn, picture frame wire, or fishing line, make a loop that goes through the D-ring on the mirror and rises to the top of the door, where the screws are. Slide the string behind the screw. Don’t wrap them around the screws as this will create more points of tension. This “extra appeal” seems like a good thing.
After all, it spreads the mirror load more evenly. But these extra points of tension will pull the rope tighter and potentially penetrate the rope directly. Once the ropes are in place, nail or screw them in the rest so they are flush with the top of the door. If they stick out a little, it might prevent the door from closing. But do not retract the screw into the groove, or you may cut the screw
Hollow Door Installation
1. Above the door mirror hook
Mirror Coop recommends sliding a door hook over the top edge of the door.
2. Connect the wires to the hooks
Hook the wires on the back of the mirrors to the door hooks. If you have a pair of D-rings on the back of the mirror and no wires, string the painting wire between the two rings and twist the ends of the wires together until the wires are taut and secure.
3. Attach the bumper to the door
Peel the felt or rubber bumper backing and stick it to the door behind the mirror, towards the bottom edge of the mirror. It should be high enough behind the mirror that it won’t show, but low enough to keep the mirror from hitting the door.
Solid Door Installation
1. Position the rearview mirror
Hold the mirror against the door you want to hang with the back facing out.
2. Mark the position
Make a pencil mark on the top of the mirror and the doors on the left and right sides.
3. Measure the size
Measure the mirror from the top edge down to one D-ring on the back. If there is a drawing line between the D-rings, remove it.
Using the measurements from step 3, measure the position of the D-ring down from the marking on the top of the mirror on the door. Mark the door again at that location.
4. Use a level
Place a 4-foot level on the door level, aligning the top edge of the level with the pencil marks you made for the D-ring. Adjust the liquid level so that the air bubbles are centered. Hillman’s OOK suggests using a pencil to draw the edge of the horizontal plane on the door.
Hold the level upright on the door and line up the edge with the pencil mark you made for the left side of the mirror. Adjust the level until the bubble is centered, indicating that the line is vertical or vertically straight. Use a pencil to draw the edge of the level until it meets the level’s horizontal line. Repeat the above steps to draw a vertical line on the right side.
5. Carry out the second set of measurements
Measure the mirror from the left all the way to the center of the nearest D-ring. This measurement indicates the location of the left mounting screw.
Measure the horizontal line from the point where the left vertical lines meet and use the measurement from step 8 to mark the location of the left mounting screw. Repeat the above steps for the right mounting screw.
6. Drill pilot holes
Drill pilot holes into the door at the mounting screw marks to a depth of about 3/4″. Use a power drill and a bit slightly smaller than the diameter of the screw.
7. Install wood screws
Use a Phillips head screwdriver to insert a 1″ coarse thread wood screw into each pilot hole in the door. Lift the screw heads about 1/8 inch from the door surface.
8. Complete the installation of the rearview mirror
Lower the mirror onto the screw until the D-ring catches the screw, suspending the mirror over the door.
Conclusion
As long as you follow the skills and methods we provide, you will find that it is not as difficult as you think to install a mirror on Zai after five years. I hope the peace article can help you easily solve the problem of installing mirrors on doors.